How to Verify Contractor Work Quality Before Payment: Your Complete Protection Guide
You've just finished a major home renovation project. The contractor stands at your door, invoice in hand, smiling confidently. But as you look around the room, something feels off. The tile grout lines aren't quite straight. That corner trim has a visible gap. The paint looks smooth from a distance, but up close, you can see brush marks. Your stomach tightens. Should you pay the full amount? Is this normal? Or are you about to hand over thousands of dollars for subpar work that you'll need to fix later?
This scenario plays out in homes across America every single day. According to Clever Real Estate research, 87% of homeowners faced issues such as extended timelines and cost overruns during renovations, with 58% of projects taking longer than expected. Additionally, 58% of renovators have at least one regret, including spending too much money (22%) and projects taking too long (16%). Homeowners face a difficult choice: confront the contractor and risk conflict, or pay up and live with work that doesn't meet expectations. The worst part? Many homeowners don't even know how to verify contractor work quality before payment, so they end up discovering problems months later when the contractor has moved on and warranty claims become battles.
This comprehensive guide will walk you through exactly how to inspect, evaluate, and verify contractor work before you hand over that final check. You'll learn the specific checkpoints for different types of projects, the red flags that indicate poor workmanship, and the professional techniques that ensure you're getting what you paid for.
Why Verifying Work Quality Before Payment Matters More Than You Think
The Financial Impact of Accepting Subpar Work
When you pay a contractor before properly verifying their work quality, you're essentially giving away your leverage. Once that check clears, your ability to get issues fixed drops dramatically. According to contractor dispute data, homeowners who pay in full before inspection are 73% less likely to get defects corrected without additional cost.
Consider Sarah from Portland, who paid her bathroom contractor the final $8,500 before carefully inspecting the shower tile work. Two weeks later, water started seeping through the grout lines. The contractor claimed the work was complete and refused to return without charging for a service call. Sarah ended up paying another contractor $3,200 to remove and redo the waterproofing. Her total cost: $11,700 for a job that should have cost $8,500.
The average cost to fix contractor mistakes ranges from $1,500 to $15,000, depending on the project scope. For major renovations, homeowners sometimes spend 30-40% more than the original contract just correcting poor workmanship.
The Hidden Costs of Accepting "Good Enough"
Beyond immediate repair costs, subpar contractor work creates ongoing problems. Poor insulation installation means higher energy bills for years. Improperly installed flooring wears unevenly and needs premature replacement. Electrical work that doesn't meet code becomes a liability when you sell your home.
These hidden costs compound over time. A $200 shortcut during HVAC installation might cost you $80 extra per month in energy bills. Over five years, that's $4,800—plus the eventual cost of proper installation.
Understanding Your Right to Inspect Before Payment
What the Law Says About Payment and Inspection
Most states recognize the homeowner's right to inspect work before final payment. Construction law typically follows the "substantial completion" standard, meaning contractors deserve payment when work is substantially complete—but not necessarily perfect. However, "substantial completion" doesn't mean you must accept obvious defects or incomplete work.
Your contract should specify inspection periods and payment milestones. Standard contracts include language like "final payment due upon satisfactory completion and inspection." This gives you legal standing to withhold payment until you've verified quality.
Keep in mind that withholding payment unreasonably can also create legal problems. You can't refuse payment for minor imperfections that don't affect functionality. The key is understanding the difference between minor cosmetic issues and legitimate quality concerns.
The Psychology of the Final Payment Conversation
Many homeowners feel uncomfortable questioning a contractor's work. You might worry about seeming difficult, damaging the relationship, or revealing your lack of construction knowledge. Contractors know this and sometimes use it to their advantage.
Remember: professional contractors expect and welcome thorough inspections. They're confident in their work and want you to be satisfied. If a contractor becomes defensive, pushy about immediate payment, or dismissive of your concerns, those are red flags indicating potential quality issues.
One effective approach is to frame inspections as standard procedure from the beginning. During contract negotiations, say something like: "I'll need two business days after completion to conduct a thorough inspection before final payment." This sets expectations and removes awkwardness later.
The Pre-Payment Inspection Timeline: When to Check What
Milestone Inspections Throughout the Project
Learning how to verify contractor work quality before payment starts long before the final day. Smart homeowners conduct inspections at key project milestones, not just at the end.
For a typical renovation, plan inspections at these stages:
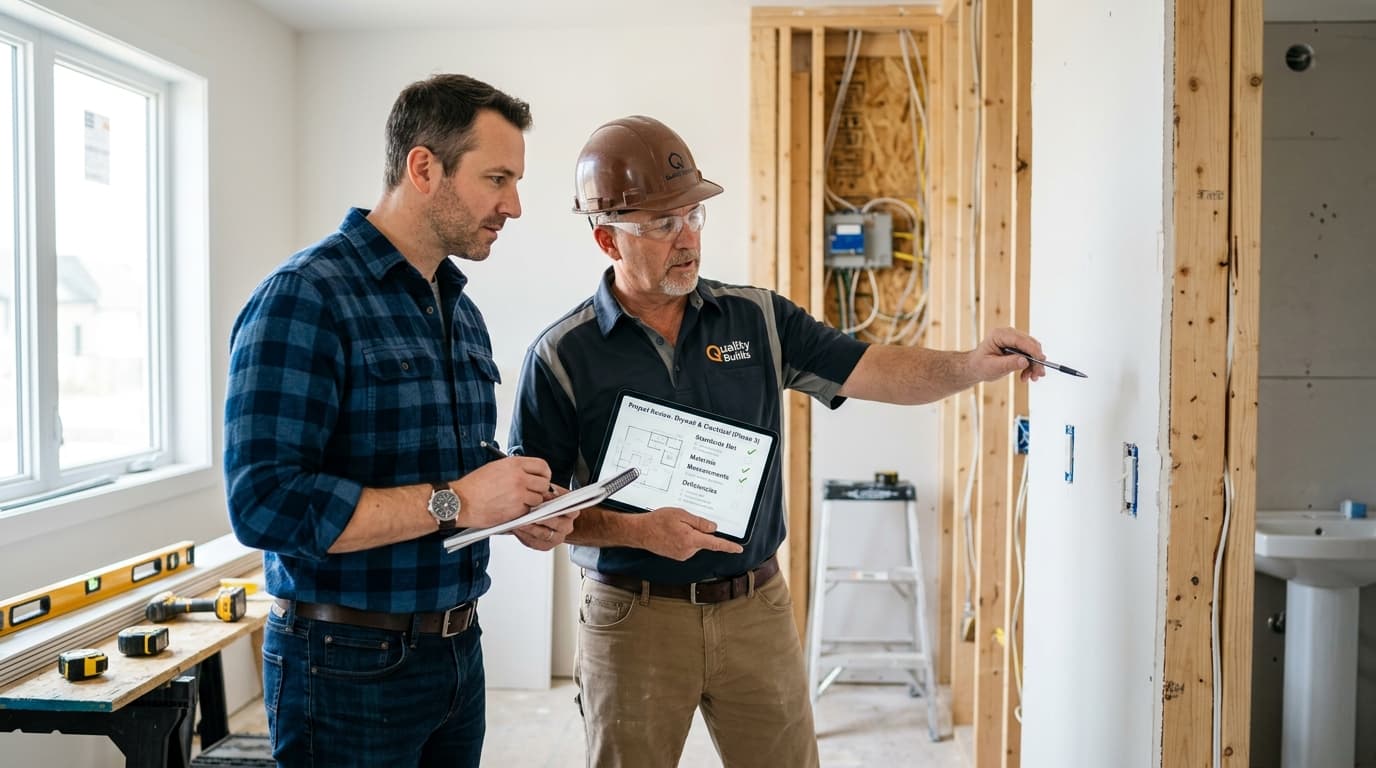
Foundation and framing stage (if applicable): Before walls are closed up, inspect structural elements, electrical rough-in, plumbing rough-in, and HVAC installation. Once drywall covers these systems, fixing problems becomes exponentially more expensive.
Mid-project checkpoint (around 50% completion): Verify that work matches plans and specifications. Check that materials match what was specified in the contract. Confirm that the project timeline remains on track.
Substantial completion (around 90% done): Conduct a detailed walkthrough identifying any defects, incomplete items, or deviations from plans. Create a punch list of items needing correction.
Final inspection (before final payment): Verify that all punch list items have been completed satisfactorily. This is your last chance to identify issues while you still have payment leverage.
The 48-Hour Rule for Final Inspections
Never conduct your final inspection with the contractor standing over your shoulder waiting for a check. Instead, implement the 48-hour rule: tell contractors you need 48 hours after they declare the project complete to conduct a thorough inspection.
This timeframe allows you to:
- Inspect during different lighting conditions (morning, afternoon, evening)
- Test all functionality multiple times
- Bring in a second set of eyes (spouse, friend, or professional inspector)
- Research any concerns you discover
- Document issues with photos and notes
During these 48 hours, actually use the renovated space. Turn lights on and off. Open and close doors and windows. Run water in new plumbing. The best way to discover functionality issues is through real-world use.
Room-by-Room Inspection Checklist: What to Look For
Kitchen Renovation Quality Checkpoints
Kitchen renovations typically cost $25,000 to $50,000, making them one of the largest contractor investments homeowners make. Here's how to verify quality before that final payment:
Cabinet installation: Open and close every cabinet door and drawer. They should move smoothly without sticking or scraping. Check that doors align properly when closed—gaps should be consistent (typically 1/8 inch). Look inside cabinets with a flashlight to verify that interiors are clean and damage-free. Cabinet boxes should be level and securely attached to walls.
Countertop work: Run your hand along seams—you shouldn't feel edges or height differences. Seams should be nearly invisible and located in low-traffic areas when possible. Check that countertops are level by placing a marble or ball bearing on the surface. Inspect the caulk line where countertops meet walls—it should be smooth and consistent. For stone countertops, verify that the finish matches throughout and that there are no chips or cracks.
Tile backsplash: Grout lines should be consistent in width (usually 1/16 to 1/8 inch). Tiles should be level—use a straight edge to check. Look for "lippage" (where one tile edge sits higher than adjacent tiles). Corners should be properly finished with trim pieces or clean miter cuts. The pattern should be symmetrical and centered on focal points like the range.
Plumbing fixtures: Test every faucet at full pressure. Water should flow smoothly without sputtering (which indicates air in lines). Check under sinks for any moisture or dripping. Garbage disposals should run quietly without vibration. Dishwashers should complete a full cycle without leaking.
Electrical work: Test all outlets with a plug tester (available at hardware stores for $10). GFCI outlets near water sources should trip when tested. Light switches should operate smoothly, and all fixtures should be securely mounted and level. Under-cabinet lighting should be evenly distributed without dark spots.
Bathroom Renovation Quality Standards
Bathrooms present unique challenges because water damage from poor installation might not appear for months. Pay special attention to waterproofing and proper slope.
Shower and tub installation: This is critical. Step into the shower and look at how water drains. It should flow directly to the drain without pooling anywhere. Pools of standing water indicate improper slope and will lead to mold and deterioration. The minimum slope should be 1/4 inch per foot toward the drain.
Tile work: Check that tiles are level using a straight edge. Grout should be consistent in color and completely fill joints. Look for hollow spots by gently tapping tiles with your knuckle—a solid sound is good, a hollow sound indicates poor adhesion. Corners and edges should be properly waterproofed with appropriate membranes (ask to see photos of waterproofing before tile installation).
Caulking and sealing: Caulk lines should be smooth and consistent. Check all joints where different materials meet (tile to tub, tile to wall, etc.). Caulk should be mildew-resistant silicone in wet areas. Press gently on caulk lines—they should be firm, not mushy or incomplete.
Ventilation: Turn on the bathroom fan and hold a tissue to the vent. It should be pulled firmly against the vent, indicating proper suction. Poor ventilation leads to mold problems. The fan should vent to the outside, not just into the attic.
Plumbing function: Flush the toilet multiple times. It should flush completely without running continuously. Fill the tub completely and drain it while watching for any leaks in the area below (if accessible). Run the shower at full pressure for five minutes while checking for leaks.
Flooring Installation Red Flags
Flooring problems are among the most common contractor complaints. Whether you've installed hardwood, laminate, tile, or carpet, here's how to verify quality:
Hardwood and laminate: Walk across the entire floor listening for squeaks or hollow sounds. Check that boards run in the correct direction (typically parallel to the longest wall or toward the main light source). Inspect spacing at walls—there should be a 1/4 to 1/2 inch expansion gap covered by baseboards. Look at board ends and seams to ensure tight fits without gaps. The floor should feel solid underfoot without bounce or flex.
Tile flooring: Use a straight edge to check for lippage. Grout lines should be consistent and completely filled. Check that tiles are laid in a logical pattern with cuts in less visible areas. Large tiles should be supported by proper substrate (cement board, not just plywood). Tap tiles to check for hollow spots indicating poor adhesion.
Carpet: Check that seams are invisible or nearly so. Carpet should be tight without wrinkles or waves. Edges should be properly tucked and secured. Walk the entire area feeling for bumps, loose areas, or inconsistent padding underneath.
Painting and Finishing Work
Paint problems are easy to spot but often dismissed as "minor" issues. Don't accept poor paint work—it's usually easy to fix before final payment but frustrating afterward.
Coverage and consistency: Look at walls from different angles and lighting conditions. You should see consistent color without streaks, roller marks, or brush strokes. Check that the specified number of coats was applied (usually two for walls, sometimes three for bold colors over light).
Trim and detail work: Inspect where wall color meets trim. Lines should be crisp and straight. Look for paint on windows, hardware, or floors—these indicate sloppy work. Check that nail holes and imperfections were properly filled and sanded before painting.
Doors and windows: Open and close all painted doors and windows. Paint shouldn't stick or crack. Check that hinges and hardware are clean and paint-free.
Technical Verification: Testing Beyond Visual Inspection
Using Simple Tools for Professional-Level Inspection
You don't need expensive equipment to verify contractor work quality before payment. A basic inspection toolkit costs under $100 and provides objective data:
Level ($15-30): Essential for checking that installations are truly level and plumb. Test countertops, cabinets, shelves, tile work, and any horizontal or vertical surface that should be level.
Outlet tester ($10-15): Plug into every outlet to verify correct wiring. These simple devices show whether outlets are wired correctly, grounded properly, and functioning safely.
Moisture meter ($30-50): Critical after any work involving water (bathrooms, kitchens, basements). Check walls and floors near plumbing for hidden moisture that indicates leaks.
Flashlight or work light ($15-25): Inspect dark areas, look inside cabinets, examine under sinks, and check detail work in corners and edges.
Tape measure ($10-15): Verify that dimensions match plans and that spacing is consistent throughout the project.
When to Hire a Professional Inspector
For projects over $20,000 or involving critical systems (structural, electrical, plumbing), consider hiring a professional inspector before final payment. This typically costs $300-600 but can save thousands by identifying problems you might miss.
Professional inspectors are particularly valuable for:
- Structural modifications (wall removal, additions, foundation work)
- Complete home renovations
- Roofing projects (inspectors can safely access and evaluate roof installations)
- Complex electrical or plumbing systems
- HVAC installation
Schedule the professional inspection as part of your 48-hour inspection period. Most contractors respect third-party verification, and professional contractors often suggest it themselves for major projects.
Creating an Effective Punch List
How to Document Issues Professionally
When you identify problems during inspection, create a detailed punch list. This document becomes the roadmap for final completion and protects both you and the contractor by clearly defining remaining work.
Your punch list should include:
Specific location: "Master bathroom, north wall, third tile from left in second row" is better than "bathroom tile problem."
Clear description: "Grout line is 1/4 inch wide while other grout lines are 1/8 inch" is better than "grout looks wrong."
Photos: Take clear, well-lit photos of every issue. Include a wide shot showing location and a close-up showing the specific problem.
Severity rating: Mark items as critical (must be fixed before payment), important (should be fixed before payment), or minor (nice to have fixed). This helps prioritize if negotiations become necessary.
Reference to contract or code: When applicable, note which contract specification or building code the issue violates. "Kitchen cabinet doors don't align, violating section 3.2 of contract specifying 1/8 inch maximum gap variance" carries more weight than "cabinet doors look crooked."
The Punch List Review Meeting
Schedule a walkthrough with the contractor to review your punch list. This isn't confrontational—it's standard procedure. Approach it professionally:
Start positive: "The overall project looks great, and I'm pleased with most of the work. I've identified some items that need attention before final payment."
Walk through each item together. Some issues might have reasonable explanations. For example, what looks like uneven grout might be intentional spacing for tile size variation. Other issues the contractor might not have noticed themselves.
Get agreement on which items will be corrected and a timeline for completion. Document this agreement in writing: "Contractor agrees to repair items 1-7 on punch list by [date]. Final payment of $[amount] will be released upon satisfactory completion of punch list items."
Payment Structures That Protect Quality
The Right Way to Structure Contractor Payments
How you structure payments throughout a project significantly impacts your ability to verify contractor work quality before payment. Never agree to pay the full amount upfront or even in a simple 50/50 split.
Recommended payment structure for most projects:
- 10-20% deposit to secure scheduling and purchase materials
- 30-40% at substantial completion of rough work (before closing walls)
- 30-40% at substantial completion of finish work
- 10-20% final payment after inspection and punch list completion
This structure ensures you always hold enough payment to motivate quality completion. The final 10-20% should equal at least 1.5 times the estimated cost to fix potential problems. For a $30,000 kitchen renovation, hold back at least $3,000-6,000 until final inspection.
Handling Retainage Professionally
The final payment holdback (called "retainage" in construction) protects your interests, but contractors need cash flow too. Be reasonable about timing:
Complete your inspection within the agreed timeframe (typically 48-72 hours after the contractor declares completion). Don't drag out the process unnecessarily.
Pay promptly once punch list items are completed satisfactorily. Contractors talk to each other—homeowners who pay fairly and on time get better service and better prices.
If disputes arise, consider paying for completed items while withholding only the amount related to disputed work. For example, if 95% of the work is perfect but there's a $500 tile repair needed, pay the 95% and hold back $750-1,000 until the tile is fixed.
Common Quality Issues by Project Type
Deck and Outdoor Construction
Outdoor projects face unique challenges from weather exposure. Here's how to verify quality:
Structural integrity: Check that posts are properly secured to footings and that the deck is securely attached to the house (if applicable). Boards should be firmly attached without bounce or movement. Railings should be solid—push hard on them to test strength.
Wood treatment and finishing: All cut ends should be sealed or treated to prevent rot. Check that fasteners are appropriate for outdoor use (galvanized or stainless steel, not regular steel that will rust). If the deck was stained or sealed, coverage should be complete and even.
Proper drainage: Water should drain away from the house and not pool on deck surfaces. Check the slope (minimum 1/4 inch per foot away from the house).
Code compliance: Deck construction is heavily regulated. Verify that railing height meets code (typically 36-42 inches), that baluster spacing is safe (no gaps wider than 4 inches), and that stairs have proper rise and run.
Roofing Projects
Roofing work is difficult to inspect without getting on the roof, which most homeowners shouldn't do. However, you can verify quality from the ground and attic:
From the ground: Use binoculars to inspect shingle alignment. Rows should be straight and even. Shingles should lie flat without curling or buckling. Check that flashing is installed around chimneys, vents, and valleys. Look at ridge caps—they should be straight and properly overlapped.
From the attic: This is critical. Go into your attic on a sunny day and look for any light coming through the roof. Light means gaps. Also check for proper ventilation installation—you should see ridge vents, soffit vents, or other ventilation systems.
Cleanup: Roofing creates debris. The contractor should thoroughly clean your property, including gutters, landscaping, and driveway. Check for nails in the yard (use a magnetic roller, which contractors should provide).
HVAC Installation
HVAC systems are complex, and most quality issues aren't visible. Focus on performance and professional installation standards:
System performance: The system should reach the set temperature within a reasonable time (typically 15-30 minutes for a 3-degree change). Air flow from vents should be strong and consistent. The system should run quietly without banging, whistling, or grinding sounds.
Installation quality: Ductwork should be properly sealed at all joints. Refrigerant lines should be insulated and properly secured. The outdoor unit should be level and have adequate clearance (typically 2 feet on all sides). Condensate drains should drain properly without leaks.
Documentation: Require written documentation of refrigerant charge levels, system testing results, and warranty registration. Professional installers provide this automatically.
Dealing with Disputes and Disagreements
When You and the Contractor Disagree on Quality
Sometimes you'll identify issues that the contractor considers acceptable. This is where clear contract language and objective standards become crucial.
Reference objective standards: Building codes, manufacturer specifications, and industry standards provide objective benchmarks. "The tile lippage exceeds the 1/16 inch maximum specified in ANSI standards" is more persuasive than "I don't like how the tile looks."
Get a third opinion: If you can't agree, hire a professional inspector or another contractor to evaluate the disputed work. Most will provide written opinions for $100-300. This investment often resolves disputes quickly.
Review your contract: What does it actually require? If your contract specifies "professional workmanship consistent with industry standards," you have grounds to require fixes. If it just says "install tile," you might have less leverage on aesthetic issues.
Consider compromise: If the issue is minor and the contractor offers a partial refund rather than repair, this might be the practical solution. Calculate whether the refund is sufficient to hire someone else to fix the problem.
Protecting Yourself from Contractor Pushback
Some contractors push back aggressively when homeowners raise quality concerns. They might claim you're being unreasonable, threaten to file a lien, or demand immediate payment. Here's how to handle this:
Stay calm and professional: Emotional reactions weaken your position. Stick to facts, contract terms, and objective standards.
Document everything: Keep copies of all communications, contracts, photos of issues, and inspection reports. Documentation is your best protection if disputes escalate.
Know your rights: Contractors can file liens, but only for work actually completed according to contract terms. They can't legally force you to pay for defective work. However, you also can't withhold payment unreasonably.
Consider mediation: Many contracts include mediation clauses. Mediation costs a few hundred dollars and often resolves disputes faster and cheaper than litigation.
When to involve an attorney: If the disputed amount exceeds $5,000-10,000 or if the contractor becomes threatening, consult a construction attorney. Many offer free initial consultations.
Red Flags That Indicate Quality Problems
Warning Signs During the Project
Learning how to verify contractor work quality before payment is easier when you spot problems early. Watch for these red flags during the project:
Rushing: Contractors who seem to be rushing through work are cutting corners somewhere. Quality work takes appropriate time.
Reluctance to explain: Professional contractors happily explain what they're doing and why. Contractors who become defensive when you ask questions might be hiding poor work.
Messy work sites: Contractors who don't clean up daily often don't pay attention to detail in their actual work either.
Changing crew members: Constant crew changes often indicate that the contractor is using unskilled labor or that skilled workers don't want to work for them.
Material substitutions: Contractors who substitute materials without discussion are making unauthorized changes. What else might they be changing?
Avoiding inspections: Contractors who discourage you from visiting the job site or who seem nervous during inspections might be hiding problems.
Post-Completion Red Flags
When the contractor declares the project complete, these signs indicate potential quality issues:
Pressure for immediate payment: Professional contractors expect inspection periods. Pressure for immediate payment suggests they want to leave before you discover problems.
Defensive attitude: Contractors who become defensive about normal inspection procedures aren't confident in their work quality.
Incomplete cleanup: Contractors who don't thoroughly clean up often didn't pay attention to finish details either.
Missing documentation: Failure to provide warranties, permits, inspection certificates, or product documentation indicates unprofessional practices.
Unwillingness to create a punch list: Professional contractors expect punch lists and address items promptly. Resistance to this normal process is a major red flag.
Special Considerations for Different Contractor Types
General Contractors vs. Specialists
How to verify contractor work quality before payment varies depending on whether you hired a general contractor or specialists:
General contractors: They coordinate multiple trades, so verify that all subcontractor work meets standards. Ask for subcontractor contact information in case issues arise later. Verify that all subcontractors were properly paid (to avoid liens). Check that work from different trades integrates properly (for example, electrical outlets should align with tile patterns).
Specialist contractors: They focus on one trade, so expect higher quality in their specialty. However, they might not consider how their work integrates with other systems. For example, a tile specialist might not think about electrical outlet placement.
Handyman Services vs. Licensed Contractors
Handyman services typically handle smaller projects. Quality standards remain important, but the verification process might be simpler:
For handyman work, focus on functionality and basic workmanship. The finish quality might not match that of a specialized contractor, and that's okay if the price reflects this difference. However, basic standards still apply: work should function properly, meet code requirements, and be completed as agreed.
For licensed contractor work on major projects, hold work to higher standards. Licensed contractors charge more specifically because they should deliver professional-quality results.
Building Long-Term Contractor Relationships
Why Quality Verification Builds Better Relationships
Ironically, thoroughly verifying contractor work quality before payment often strengthens contractor relationships rather than damaging them. Here's why:
Professional contractors appreciate working with informed homeowners who understand quality standards. They'd rather address issues immediately than receive complaint calls months later.
Clear quality expectations from the beginning lead to better results. When contractors know you'll inspect thoroughly, they're more careful during installation.
Fair payment for quality work builds mutual respect. Contractors who deliver quality work and receive prompt payment after reasonable inspection are happy to work with you again—often at better prices because they know you're a good client.
Creating Quality Standards for Future Projects
Use each project to refine your ability to verify quality. Keep notes about what to check, which tools were helpful, and which inspection methods worked best. If you're managing multiple home improvement projects, consider using a home maintenance management app to track contractor performance, inspection checklists, and quality issues across projects.
Build a file of good contractors who delivered quality work. When you need future work, you'll have trusted professionals to call. Good contractors are worth their weight in gold—and they're much easier to find when you've already worked with them successfully.
The Final Payment Conversation
How to Release Payment Professionally
Once you've verified quality and all punch list items are complete, release final payment promptly. Here's how to handle this final interaction professionally:
Provide positive feedback: If the contractor delivered quality work, tell them. "The kitchen looks fantastic, and I appreciate your attention to the details we discussed" goes a long way.
Request final documentation: Before final payment, obtain warranties, care instructions, paint color codes, product information, and any other documentation you'll need for future maintenance.
Discuss future work: If you're satisfied, mention other projects you're planning. Good contractors appreciate knowing they might get future business.
Provide payment as agreed: If the contract specifies check payment, have it ready. If bank transfer was agreed, process it immediately. Don't make contractors wait unnecessarily once work is complete.
Request a receipt: Get a final receipt marked "Paid in Full" that details the total project cost and confirms no remaining balance.
Protecting Your Payment Records
Keep detailed payment records for tax purposes and future reference:
- Copy of the final contract with any change orders
- All payment receipts
- Before and after photos
- Warranty information
- Product specifications and care instructions
- Contractor license and insurance information
These records prove valuable when you sell your home (buyers want to know about major improvements), file insurance claims, or plan future projects.
Creating Your Personal Inspection System
Developing Your Quality Checklist
Every home and project is unique, but you can develop a personal system for how to verify contractor work quality before payment:
Start with this article's checklists: Use the room-by-room and project-type checklists provided here as your foundation.
Customize for your project: Add specific items from your contract. If you specified particular materials, finishes, or techniques, add verification steps for these.
Research industry standards: Look up manufacturer installation requirements for major products. For example, if you're installing luxury vinyl plank flooring, the manufacturer provides specific installation standards.
Learn from each project: After each contractor project, note what you wish you'd checked more carefully. Add these items to your checklist for next time.
Share with your contractor: Provide your inspection checklist to contractors before they start. This sets clear expectations and often improves quality because contractors know exactly what you'll be checking.
Tools and Resources for Ongoing Quality Verification
Build a homeowner's inspection toolkit over time. Beyond the basic tools mentioned earlier, consider:
Photo documentation system: Use your smartphone to create project-specific photo albums. Take photos before work begins, during key milestones, and after completion. These photos are invaluable for insurance, resale, and future projects.
Contractor evaluation system: Keep notes about each contractor you work with. Rate them on quality, communication, timeliness, and value. This information helps when you need to hire contractors for future projects or when friends ask for recommendations. Understanding how to research before hiring contractors can save significant time and money.
Industry resource library: Bookmark helpful websites like manufacturer installation guides, building code resources, and homeowner forums where you can ask questions about specific quality concerns.
Moving Forward with Confidence
Knowing how to verify contractor work quality before payment transforms you from a vulnerable homeowner into an informed consumer. You'll approach contractor projects with confidence rather than anxiety. You'll know what to look for, when to look for it, and how to address issues professionally.
Remember that quality verification isn't about being adversarial or difficult. It's about ensuring you receive the work you're paying for. Professional contractors welcome this approach because it leads to satisfied clients and positive referrals.
Start your next contractor project by:
- Including clear quality standards and inspection periods in your contract
- Planning inspections at key milestones, not just at the end
- Assembling your basic inspection toolkit
- Creating project-specific checklists based on the guidance in this article
- Documenting everything with photos and notes
- Conducting thorough inspections before releasing final payment
- Addressing issues professionally with clear punch lists
- Paying promptly once quality work is verified
The small amount of time you invest in proper inspection saves thousands of dollars and countless headaches. You'll build relationships with quality contractors, avoid the frustration of discovering problems after payment, and create a home you're truly proud of.
Your home is likely your largest investment. Protecting that investment by verifying contractor work quality isn't just smart—it's essential. With the knowledge and tools provided in this guide, you're now equipped to approach your next contractor project with confidence and achieve the quality results you deserve.
Related Articles:
- How to Avoid Contractor Problems During Home Renovations: A Homeowner's Complete Protection Guide
- How to Prevent Contractor Disputes: Your Complete Guide to Avoiding Project Conflicts and Misunderstandings
- How to Evaluate Home Improvement Work Quality: A Homeowner's Guide to Realistic Standards and Red Flags
- The Complete Homeowner's Guide to Contractor License Verification: Protect Your Investment and Peace of Mind
Need Professional Help?
Homeplexi connects you with vetted contractors, helps you compare quotes, and manages your entire home improvement project in one place.
Get Started Free →Important Safety Disclaimer
Please read this carefully before following any advice:
- Always prioritize safety: Wear appropriate protective equipment (safety glasses, gloves, etc.) when performing any home maintenance or repair work.
- Know your limits: If you're not confident in your ability to safely complete a task, hire a licensed professional. This is especially important for electrical, gas, plumbing, and structural work.
- Verify all information: The guidance provided here is based on community discussions and general knowledge. Always double-check any advice with multiple reliable sources or a licensed professional.
- Follow local codes: Building codes, electrical codes, and plumbing codes vary by location. Ensure any work complies with your local regulations and obtain necessary permits.
- Turn off power/water/gas: Before working on electrical, plumbing, or gas systems, always shut off the relevant utilities at the source.
- For emergencies: If you have a gas leak, electrical fire, major water leak, or other emergency, evacuate immediately and call emergency services (911) and your utility company.
Liability: Homeplexi provides information for educational purposes only. We are not responsible for any injury, property damage, or losses resulting from following any guidance or advice provided through this platform. Use all information at your own risk.
When in doubt, always consult a licensed, insured professional contractor. Homeplexi can help you find qualified professionals in your area.
Found this helpful? Share with others:
Related Articles
12 Critical Contractor Red Flags That Could Cost You Thousands (And How to Spot Them Before It's Too Late)
The warning signs pros know to spot, and how they save thousands by walking away before it's too late.
How to Lower Electric Bills: Proven Strategies That Actually Work When Basic Tips Fail
Electric bills climbing higher than expected despite energy-saving efforts
Foundation Repair Cost: What You Should Actually Pay in Your Region
Foundation repair quotes vary wildly by region and homeowners don't know what's fair pricing vs price gouging